Difference between revisions of "Groups"
Jump to navigation
Jump to search
| Line 28: | Line 28: | ||
{| class="table" | {| class="table" | ||
|[[Image:InfoTab.png|left|top|link=Group_Info]] | |[[Image:InfoTab.png|left|top|link=Group_Info]] | ||
| | |'''[[Group Info|Info Tab]]''' - Click the <u>[[Group Info|Info tab]]</u> to: | ||
* View general information about the Group, including the Group's address and distributor | |||
* View the log of Group activity | |||
|} | |} | ||
<strong>Accounts</strong> | <strong>Accounts</strong> | ||
Revision as of 22:36, 19 November 2013
  |
OverviewGroups are a business unit of accounts that are managed by a common administrator. Every account must be a member of a group, and only one group. A group might be a single long-term care community, a single in-home care company, or a single vendor managing and providing supports for multiple accounts. |

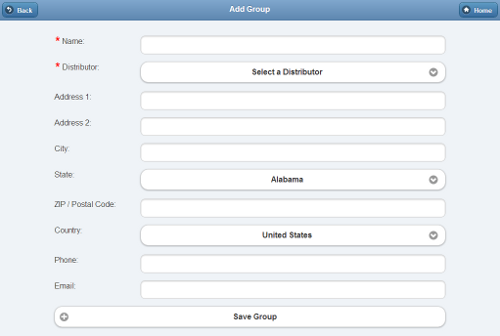
Add a New Group Screen
Creating a Group
Groups can be created by users who have a role of Distributor Admin or above. To add a new Group:
- Click the "Manage Groups" button on the Dashboard.
- Click the "Actions" tab.
- Click the "Add a new Group" button.
- Enter a name for the Group, then select a Distributor.
- These two fields are required.
- Enter the remaining information.
- Note that the email address entered receives alert messages when system status for any group member changes to "down" or "up".
- It's recommended to use an email address for an email distribution list as the Group email, rather than an email address for a single person.
- Click the "Save Group" button.
Group Management Features
To manage a Group:
- Click the "Manage Groups" button on the Dashboard.
- Click the Group you wish to manage.
- Click the appropriate tab:
 |
Info Tab - Click the Info tab to:
|
Accounts
Click the Accounts tab to:
- View general information about the Group, including the Group's address and distributor
- View the log of Group activity