Difference between revisions of "Z-Stick Configuration"
Jump to navigation
Jump to search
m (Removed the word GCTV) |
m (Formatting) |
||
| Line 2: | Line 2: | ||
[[File:PeripheralsScreenForZ-Stick.png|right|frame|Peripherals Screen]] | [[File:PeripheralsScreenForZ-Stick.png|right|frame|Peripherals Screen]] | ||
[[File:Z-WavePorts.png|right|frame|Choose a Port]] | [[File:Z-WavePorts.png|right|frame|Choose a Port]] | ||
===Overview=== | |||
When you are using Z-Wave protocol ADL sensors, you have your choice of two Z-Wave transceivers (antennas), the Z-Stick or the [[Z-Troller Configuration|Z-Troller]]. The Z-Stick is more commonly used, because of its small form factor. It is also easy to use, and less expensive than the Z-Troller. The Z-Stick has a shorter range than the Z-Troller, and is appropriate for demo systems, apartments, and smaller houses.<br /><br /> | When you are using Z-Wave protocol ADL sensors, you have your choice of two Z-Wave transceivers (antennas), the Z-Stick or the [[Z-Troller Configuration|Z-Troller]]. The Z-Stick is more commonly used, because of its small form factor. It is also easy to use, and less expensive than the Z-Troller. The Z-Stick has a shorter range than the Z-Troller, and is appropriate for demo systems, apartments, and smaller houses.<br /><br /> | ||
===How to Install a Z-Stick=== | |||
At the touchscreen (or for a CoMo box - at the system emulation image): | At the touchscreen (or for a CoMo box - at the system emulation image): | ||
* Insert the Z-Stick into an available USB port (typically a port on the back of the machine, ideally a lower port, so that smaller USB devices will be visible above the Z-Stick) | * Insert the Z-Stick into an available USB port (typically a port on the back of the machine, ideally a lower port, so that smaller USB devices will be visible above the Z-Stick) | ||
| Line 17: | Line 17: | ||
* If installed correctly, the row will now be highlighted in green. If there is a problem with the installation, the row will be highlighted in red. | * If installed correctly, the row will now be highlighted in green. If there is a problem with the installation, the row will be highlighted in red. | ||
* After it is installed correctly, you can begin to [[Add Z-Wave Devices|add Z-Wave devices]], such as motion sensors, door sensors, etc.<br /><br /> | * After it is installed correctly, you can begin to [[Add Z-Wave Devices|add Z-Wave devices]], such as motion sensors, door sensors, etc.<br /><br /> | ||
Revision as of 14:55, 24 July 2017

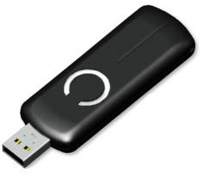
Z-Stick

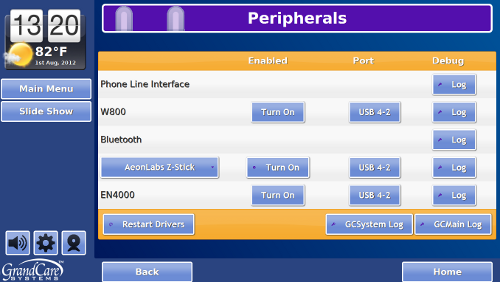
Peripherals Screen

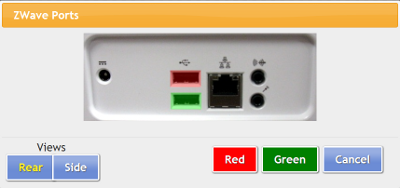
Choose a Port
Overview
When you are using Z-Wave protocol ADL sensors, you have your choice of two Z-Wave transceivers (antennas), the Z-Stick or the Z-Troller. The Z-Stick is more commonly used, because of its small form factor. It is also easy to use, and less expensive than the Z-Troller. The Z-Stick has a shorter range than the Z-Troller, and is appropriate for demo systems, apartments, and smaller houses.
How to Install a Z-Stick
At the touchscreen (or for a CoMo box - at the system emulation image):
- Insert the Z-Stick into an available USB port (typically a port on the back of the machine, ideally a lower port, so that smaller USB devices will be visible above the Z-Stick)
- Press the System (Gear) button
- Enter the 4-digit System PIN (which is set, and can be viewed, on the Advanced Settings screen in the Care Menu)
- Press "Peripherals"
- Choose the antenna type (Aeon Labs Z-Stick)
- Choose the port - your choices will be specific to the system hardware
- Press "Turn On"
- Restart peripherals when prompted
- If installed correctly, the row will now be highlighted in green. If there is a problem with the installation, the row will be highlighted in red.
- After it is installed correctly, you can begin to add Z-Wave devices, such as motion sensors, door sensors, etc.