Difference between revisions of "Add Z-Wave Devices"
Jump to navigation
Jump to search
m (Formatting changes) |
m (formatting) |
||
| Line 1: | Line 1: | ||
===Z-Wave Battery Tip=== | |||
We recommend Lithium-based batteries (such as the Energizer Lithium Ultimate AAAs) for all Z-Wave devices. Although more expensive, the improved life/performance is well worth the money.<br /><br /> | We recommend Lithium-based batteries (such as the Energizer Lithium Ultimate AAAs) for all Z-Wave devices. Although more expensive, the improved life/performance is well worth the money.<br /><br /> | ||
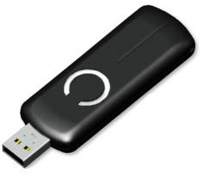
[[File:Z-Stick.png|right|frame|Z-Stick]] | [[File:Z-Stick.png|right|frame|Z-Stick]] | ||
===Adding Z-Wave Devices with a Z-Stick=== | |||
Setting up Z-Wave devices is done primarily at the Touchscreen System, but requires some additional configuration at the Care Menu.<br /><br /> | Setting up Z-Wave devices is done primarily at the Touchscreen System, but requires some additional configuration at the Care Menu.<br /><br /> | ||
'''At the Touchscreen System:''' | '''At the Touchscreen System:''' | ||
| Line 31: | Line 31: | ||
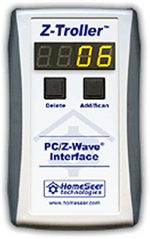
[[File:Z-Troller.png|right|frame|Z-Troller]] | [[File:Z-Troller.png|right|frame|Z-Troller]] | ||
===Adding Z-Wave Devices with a Z-Troller=== | |||
Setting up Z-Wave devices is done primarily at the Touchscreen System, but requires some additional configuration at the Care Menu.<br /><br /> | Setting up Z-Wave devices is done primarily at the Touchscreen System, but requires some additional configuration at the Care Menu.<br /><br /> | ||
'''At the Touchscreen System:''' | '''At the Touchscreen System:''' | ||
| Line 54: | Line 54: | ||
* Click the "Next" button, which saves the configuration<br /><br /> | * Click the "Next" button, which saves the configuration<br /><br /> | ||
<br /> | <br /> | ||
Revision as of 15:17, 21 July 2017
Z-Wave Battery Tip
We recommend Lithium-based batteries (such as the Energizer Lithium Ultimate AAAs) for all Z-Wave devices. Although more expensive, the improved life/performance is well worth the money.

Z-Stick
Adding Z-Wave Devices with a Z-Stick
Setting up Z-Wave devices is done primarily at the Touchscreen System, but requires some additional configuration at the Care Menu.
At the Touchscreen System:
- Before you can add devices, you must install the Z-Stick
- Disconnect the Z-Stick from the system
- Press the blue-ringed button on the stick for several seconds to put it in Delete Mode – rapid blink
- At the first device, press the button on the device to delete it from the stick. Do this even if you have not added the device to the stick yet. (Note, for Hawking contact sensors, press the button 3 times rapidly, rather than just once.)
- Press the blue-ringed button to turn off delete mode, then press the button again to put the Z-Stick in Add Mode – slow blink
- At the same device, press the button on the device to add it to the stick – the blue ring will go solid. (Note, for Hawking contact sensors, press the button 3 times rapidly, rather than just once.)
- Repeat the previous 4 steps for each device
- Plug the Z-Stick back into the system
- On the touchscreen:
- Press the System (Gear) button
- Enter the 4-digit System PIN (which is set, and can be viewed, on the Advanced Settings screen in the Care Menu)
- Press "Devices"
- Press the "Scan Zwave Network" button - the scan will start automatically
- Some devices may show up as "Unknown Device" - these may have gone back to sleep. Press the program button on the device again, then click the Unknown Device on the Devices screen, and click the "Rescan" button.
At the Care Menu:
- Log in to the Online Care Portal
- Open the Care Menu
- Open the appropriate module
- For motion, door, bed sensors, and medication dispensers, open the Activity module (Note that all contact sensors, whether for a door, bed or medication dispenser) will initially appear as a door sensor, until you select the correct type)
- For action buttons, open the Notifications module
- Click the gear-shaped "Configure This Device" button to the right of the appropriate sensor
- For contact sensors, select the proper type, then enter a Location and Description, if requested, for the device. (Note that the description is used in automated alert phone calls, so the description should not be technical.)
- Click the "Next" button, which saves the configuration

Z-Troller
Adding Z-Wave Devices with a Z-Troller
Setting up Z-Wave devices is done primarily at the Touchscreen System, but requires some additional configuration at the Care Menu.
At the Touchscreen System:
- Before you can add devices, you must install the Z-Troller
- At the first device, press and hold Delete on the Z-Troller and press the program button on the device. The Z-Troller should flash "done."
- Press and hold Add/Scan on the Z-Troller and press the program button on the device. The Z-Troller should give you the node ID of the device.
- Repeat the previous 2 steps for each device
- On the touchscreen:
- Press the System (Gear) button
- Enter the 4-digit System PIN (which is set, and can be viewed, on the Advanced Settings screen in the Care Menu)
- Press "Devices"
- Press the "Scan Z-Wave Network" button - the scan will start automatically
- Some devices may show up as "Unknown Device" - these may have gone back to sleep. Press the program button on the device again, then click the Unknown Device on the Devices screen, and click the "Rescan" button.
At the Care Menu:
- Log in to the Online Care Portal
- Open the Care Menu
- Open the appropriate module
- For motion, door, bed sensors, and medication dispensers, open the Activity module (Note that all contact sensors, whether for a door, bed or medication dispenser) will initially appear as a door sensor, until you select the correct type)
- For action buttons, open the Notifications module
- Click the gear-shaped "Configure This Device" button to the right of the appropriate sensor
- For contact sensors, select the proper type, then enter a Location and Description, if requested, for the device. (Note that the description is used in automated alert phone calls, so the description should not be technical.)
- Click the "Next" button, which saves the configuration