Difference between revisions of "Obsolete Help For Residents Old"
Jump to navigation
Jump to search
m (Eumhoefer moved page Help For Residents Old to Obsolete Help For Residents Old without leaving a redirect) |
|||
| (15 intermediate revisions by 2 users not shown) | |||
| Line 1: | Line 1: | ||
<!--<h3 style="display: inline-block; background:#ffffff; font-weight:bold; border-bottom:2px solid #6093cc; text-align:left; color:#000; padding:0.2em 0.4em;"><br />Using This Help Guide</h3> | |||
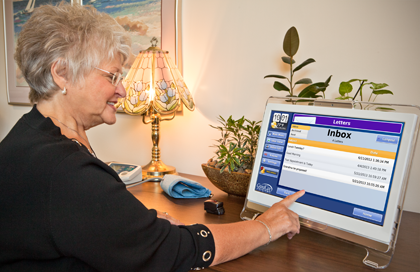
<h3 style="display: inline-block; background:#ffffff; font-weight:bold; border-bottom:2px solid #6093cc; text-align:left; color:#000; padding:0.2em 0.4em;"><br />Using This Help Guide</h3> | This guide is intended for those who would like to learn a little more about the system, what it offers, and how it works. You don't need ''any'' prior computer experience to use your system. It has been designed to be easy to operate, with just the push of a button. Use of this Help Guide is completely optional, and many people will start using this system without referring to the User's Guide. That's perfectly fine.<br /><br /> | ||
This guide is intended for those who would like to learn a little more about the system, what it offers, and how it works. You don't need ''any'' prior computer experience to use your | |||
There is another [[Help For Caregivers|guide available for Caregivers]], that covers how to [[Logging In|log in]] and use the features of the [[Care Menu|Care Menu]] through the Internet. If you still have questions, feel free to contact GrandCare Customer Support (CustomerSupport@grandcare.com).<br /><br /> | There is another [[Help For Caregivers|guide available for Caregivers]], that covers how to [[Logging In|log in]] and use the features of the [[Care Menu|Care Menu]] through the Internet. If you still have questions, feel free to contact your support specialist, or GrandCare Customer Support (CustomerSupport@grandcare.com).<br /><br />--> | ||
<h3 style="display: inline-block; background:#ffffff; font-weight:bold; border-bottom:2px solid #6093cc; text-align:left; color:#000; padding:0.2em 0.4em;"> | [[File:Using-the-system.png|right|frame|You don't need ''any'' prior computer experience to use your system. It has been designed to be easy to operate, with just the push of a button.]] | ||
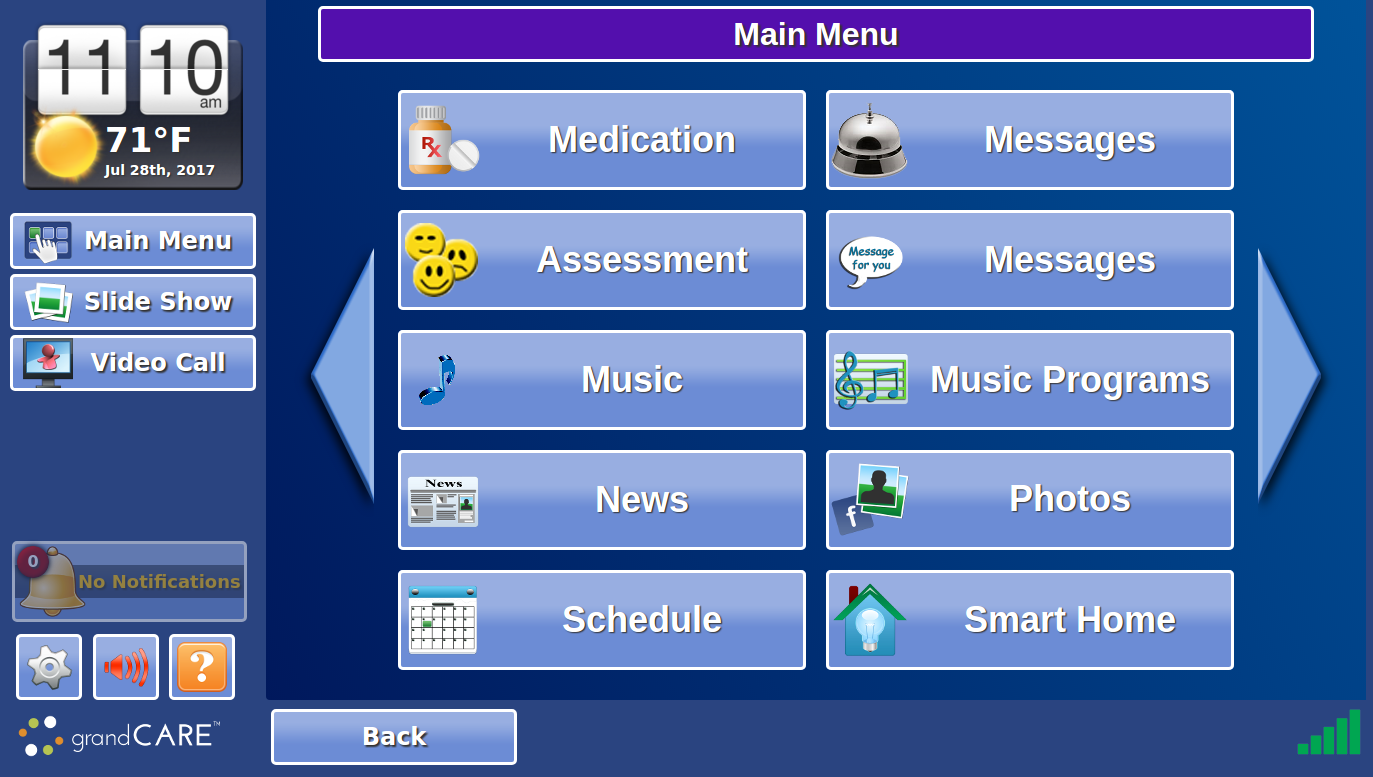
[[File:Touchscreen-Main-Menu.png|right|frame|Touchscreen Main Menu]] | |||
[[Image: | <h3 style="display: inline-block; background:#ffffff; font-weight:bold; border-bottom:2px solid #6093cc; text-align:left; color:#000; padding:0.2em 0.4em;">Your Touchscreen</h3> | ||
< | |||
<big>'''[[Time and Weather|Time and Weather]]'''</big> - The current | {| class="table" | ||
:[[ | |[[Image:Time-and-weather-sm.png|left|top|link=Time_and_Weather]] | ||
|<u><big>'''[[Time and Weather|Time and Weather]]'''</big></u> - The current [[Time and Weather#Time|Time]], temperature and [[Time and Weather#Time|Weather]] conditions appear at the top of your screen. Press the temperature to see your local forecast. Press the [[Time and Weather#Time|Time]] to see a full-screen clock.<br /> | |||
:*'''[[Main Menu|Learn more...]]''' | |||
|} | |||
{| class="table" | |||
|[[Image:MainMenuButton.png|left|link=Main_Menu]] | |||
|<u><big>'''[[Main Menu]]'''</big></u> - Pressing the Main Menu button to bring you to your [[Main Menu]]. The [[Main Menu]] gives you access to the features of your System.<br /> | |||
:*'''[[Main Menu|Learn more...]]''' | |||
|} | |||
{| class="table" | |||
|[[Image:SlideShowButton.png|left|link=Slide_Show]] | |||
|<u><big>'''[[Slide Show]]'''</big></u> - You can choose to start and move through the [[Slide Show]] whenever you want, by pressing the Slide Show button on your screen.<br /> | |||
:*'''[[Slide Show|Learn more...]]''' | |||
|} | |||
{| class="table" | |||
|[[Image:VolumeButton.png|left|link=Volume_Control_Button]] | |||
|<u><big>'''[[Volume Control Button]]'''</big></u> - Press the Volume button to adjust the volume. This affects [[Music]] and [[Videos]], [[Video Chat]], and audio [[Messages]].<br /> | |||
:*'''[[Volume Control Button|Learn more...]]''' | |||
|} | |||
{| class="table" | |||
|[[Image:SystemButton.png|left|link=System_Button]] | |||
|<u><big>'''[[System Button]]'''</big></u> - Press the System button for access to the system controls. This is a restricted area, which requires a System PIN. This button is used by your Installer, or your Primary Caregiver during set up.<br /> | |||
:*'''[[System Button|Learn more...]]''' | |||
|} | |||
{| class="table" | |||
[[Image: | |[[Image:SkypeButton.png|left|link=Video_Chat_Button]] | ||
<big>'''[[ | |<u><big>'''[[Video Chat Button]]'''</big></u> - Press the Video Chat button to start a video call. Pressing the button will show you a list of people that you can call.<br /> | ||
:[[ | :*'''[[Video Chat Button|Learn more...]]''' | ||
|} | |||
{| class="table" | |||
[[Image: | |[[Image:ScrollingBannerWithFrame.png|none|link=Scrolling_Banner]] | ||
<big>'''[[ | |- | ||
:[[ | |<u><big>'''[[Scrolling Banner|Scrolling Banner]]'''</big></u> - You can have messages display across the bottom of your screen. This is useful for reminders, for today's date, or for friendly greetings.<br /> | ||
:*'''[[Scrolling Banner|Learn more...]]''' | |||
|} | |||
< | <br /> | ||
<h3 style="display: inline-block; background:#ffffff; font-weight:bold; border-bottom:2px solid #6093cc; text-align:left; color:#000; padding:0.2em 0.4em;">Safety and Maintenance </h3> | |||
: | |||
:*<big>'''[[Packaging and Disposal|Packaging and Disposal]]'''</big> | |||
<big>'''[[ | |||
:*<big>'''[[Cleaning Instructions|Cleaning Instructions]]'''</big> | |||
<big>'''[[ | |||
:*<big>'''[[Safety Precautions|Safety Precautions]]'''</big> | |||
<br /> | |||
<big>'''[[ | <br /> | ||
<br /> | |||
</ | {| class="wikitable" | ||
|- | |||
! scope="col"| <small>Caregiver Links</small> | |||
|- | |||
|<small>[[Weather]] - [[Temperature]] - [[Touchscreen Main Menu]] - [[Digital Slide Show]] - [[Video Chat]] - [[Messages]] - [[Optional Display Settings]]</small> | |||
Latest revision as of 21:58, 19 July 2017

You don't need any prior computer experience to use your system. It has been designed to be easy to operate, with just the push of a button.

Touchscreen Main Menu
Your Touchscreen
 |
Time and Weather - The current Time, temperature and Weather conditions appear at the top of your screen. Press the temperature to see your local forecast. Press the Time to see a full-screen clock. |
 |
Main Menu - Pressing the Main Menu button to bring you to your Main Menu. The Main Menu gives you access to the features of your System. |
 |
Slide Show - You can choose to start and move through the Slide Show whenever you want, by pressing the Slide Show button on your screen. |
 |
Volume Control Button - Press the Volume button to adjust the volume. This affects Music and Videos, Video Chat, and audio Messages. |
 |
System Button - Press the System button for access to the system controls. This is a restricted area, which requires a System PIN. This button is used by your Installer, or your Primary Caregiver during set up. |
 |
Video Chat Button - Press the Video Chat button to start a video call. Pressing the button will show you a list of people that you can call. |
 |
| Scrolling Banner - You can have messages display across the bottom of your screen. This is useful for reminders, for today's date, or for friendly greetings. |
Safety and Maintenance
| Caregiver Links |
|---|
| Weather - Temperature - Touchscreen Main Menu - Digital Slide Show - Video Chat - Messages - Optional Display Settings |